

Crispy Chicken Tenders Recipe
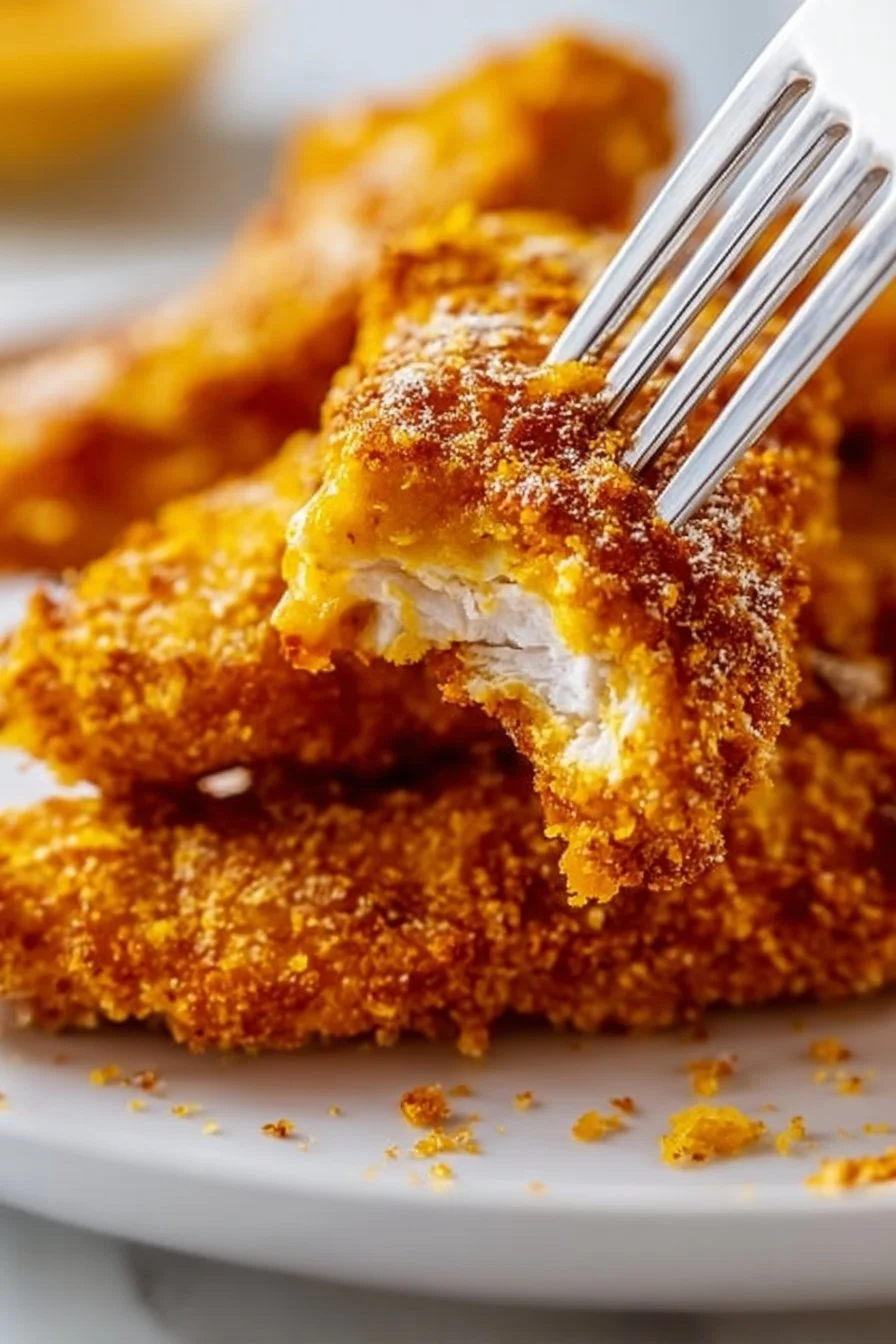
There’s something universally appealing about crispy chicken tenders. Whether you enjoy them as a snack, a meal, or finger food for game day, they boast a perfectly crunchy exterior combined with tender, juicy meat. These tenders are perfect for dipping in your favorite sauce or pairing with a side dish. What’s more, homemade crispy chicken tenders can be quicker and healthier than the fast-food variety! In this article, you’ll learn how to create the ultimate crispy chicken tenders at home that will have everyone coming back for seconds.
Why You’ll Love These Crispy Chicken Tenders
When it comes to crispy chicken tenders, there are plenty of reasons to love this recipe! Here are just a few:
- Quick and Easy: Perfect for a weeknight dinner, this recipe can be ready in under 30 minutes!
- Perfect for Beginners: With straightforward steps, it’s an ideal recipe for novice cooks looking to build confidence in the kitchen.
- Ideal for the Whole Family: Kids and adults alike can’t resist this delicious dish, making it perfect for family meals.
- Economical: Chicken tenders are cost-effective, and making them at home saves a trip to the drive-thru.
- Customizable: Adjust seasonings and coatings to suit your taste preferences!
The Necessary Ingredients
Before diving into the recipe, let’s gather our essential ingredients. Here’s what you’ll need to make the perfect crispy chicken tenders:
- 1 pound chicken breasts, cut into strips
- 1 cup all-purpose flour
- 2 eggs
- 1 cup breadcrumbs
- 1 teaspoon garlic powder
- 1 teaspoon paprika
- Salt and pepper to taste
- Oil for frying (if frying)
Notes and Substitutions on Ingredients
- Chicken breasts: While boneless, skinless chicken breasts are a classic choice, you can use chicken thighs for a juicier flavor.
- Breadcrumbs: Traditional breadcrumbs work well, but panko breadcrumbs will give you an even crispier texture.
- Paprika: This adds a lovely flavor and color, but feel free to swap it with other seasonings like cayenne pepper for some heat or Italian seasoning for a herby twist.
How to Prepare the Crispy Chicken Tenders Step by Step
Now that we have our ingredients, it’s time to get cooking! Follow these instructions closely for the best results.
-
Preheat the oven: If you’re planning to bake the chicken tenders, preheat your oven to 400°F (200°C) to prepare it for baking. This helps ensure a crispy exterior.
- Pro Tip: For baking, using a convection setting can further enhance the crispiness by circulating hot air around the chicken.
-
Set up your stations: In one bowl, place the flour, in another bowl, beat the eggs, and in a third bowl, mix together the breadcrumbs, garlic powder, paprika, salt, and pepper.
- Pro Tip: Organizing your ingredients in this way is called a "breading station," and it helps streamline the coating process.
-
Coat the chicken: Dip each chicken strip into the flour, make sure it’s fully coated, then dip it into the egg, allowing any excess to drip off, and finally coat it in the breadcrumb mixture.
- Pro Tip: The sequence is crucial! The flour helps the egg adhere, and the egg allows the breadcrumbs to stick better.
-
Arrange the tenders: Place the coated chicken tenders on a baking sheet. If baking, drizzle with oil for extra crispiness and bake for 15-20 minutes, turning halfway through for even cooking. If frying, heat oil in a pan and fry until golden brown and cooked through, about 5-7 minutes.
- Pro Tip: Use a wire rack on your baking sheet to allow airflow underneath for optimal crispiness.
-
Serve hot and enjoy!: Once cooked through, let them sit for a minute before serving. This allows the juices to settle for optimal tenderness.
- Pro Tip: Chicken is safe to eat at an internal temperature of 165°F; a meat thermometer is your best friend!
Serving Suggestions
Now that your crispy chicken tenders are ready, here are some creative ways to serve them!
Perfect Pairings
- Dipping Sauces: Serve with honey mustard, barbecue sauce, ranch dressing, or a spicy sriracha mayo for added flavor!
- Side Dishes: Pair with crispy fries, a fresh salad, or coleslaw for a complete meal.
Occasions
- Weeknight Dinner: Quick and satisfying, it’s perfect for a family meal.
- Game Day Snack: Perfect finger food for watching sports with friends.
Serving Tips
- Consider serving on a wooden platter for rustic charm, and garnish with fresh herbs for a pop of color.
Storage and Reheating Tips
To keep your crispy chicken tenders fresh, follow these guidelines:
Refrigerated
- Duration: Store in an airtight container for up to 3 days.
- Type of container: Use a glass or plastic container with a tight seal to maintain moisture.
Freezed
- If possible: Chicken tenders can be frozen for up to 3 months.
- Packaging: Wrap individually in plastic wrap, then place in a freezer-safe bag.
- Defrosting: Thaw in the refrigerator overnight before reheating.
Reheating
- Best method: For best results, reheat in the oven at 375°F (190°C) for about 10-15 minutes. This helps to keep them crispy!
Guaranteed Success Tips
To ensure your crispy chicken tenders turn out perfect every time, follow these golden rules:
- Don’t rush the breading process: Evenly coat your chicken to avoid any bare spots.
- Maintain oil temperature: If frying, make sure the oil is hot enough before adding chicken to avoid sogginess.
- Avoid overcrowding: Whether baking or frying, give each tender room to breathe for the best crisp.
- Use a wire rack: Placing cooked tenders on a wire rack helps keep them crispy instead of soggy.
Recipe Variations
Feel free to switch it up with these creative variations:
- For a Spicy Version: Add 1 teaspoon of cayenne pepper to your breadcrumb mixture to pack some heat!
- For a Vegan Version: Replace the eggs with flax eggs (1 tablespoon ground flaxseed mixed with 2.5 tablespoons water per egg) and use a plant-based milk in the breading process.
- For a Local Twist: Add some crumbled cheese to the breadcrumbs, like Parmesan or feta, for added flavor.
Frequently Asked Questions (FAQ)
Q: Can I use frozen chicken breasts?
A: Yes! Just ensure they are thoroughly defrosted before proceeding with the recipe.
Q: What if my coating falls off while cooking?
A: Ensure you are properly coating each piece and allow the egg to adhere before covering in breadcrumbs.
Q: How do I know if the chicken is fully cooked?
A: A meat thermometer should read 165°F in the thickest part of the chicken.
Q: Can I bake them instead of frying?
A: Absolutely! Baking is a healthier option and still results in a crispy texture.
Q: What dipping sauces pair well with these tenders?
A: Honey mustard, ranch, sriracha mayo, and barbecue sauce are all great choices!
Q: Can I add more spices to the breadcrumb mixture?
A: Definitely! Feel free to customize the spices based on your preference.
Q: Is this a gluten-free recipe?
A: You can substitute regular flour with gluten-free flour and use gluten-free breadcrumbs for a gluten-free version.
With this delicious and practical guide, you’re now ready to whip up a batch of crispy chicken tenders that will have everyone raving! Happy cooking!

Crispy Chicken Tenders
Ingrédients
Method
- Preheat your oven to 400°F (200°C) if you’re planning to bake the chicken tenders.
- Set up your stations: In one bowl, place the flour; in another bowl, beat the eggs; and in a third bowl, mix the breadcrumbs, garlic powder, paprika, salt, and pepper.
- Dip each chicken strip into the flour, then into the egg, allowing excess to drip off, and finally coat it in the breadcrumb mixture.
- Arrange the coated chicken tenders on a baking sheet. For baking, drizzle with oil and bake for 15-20 minutes, turning halfway. If frying, heat oil in a pan and fry until golden brown and cooked through, about 5-7 minutes.
- Serve hot and enjoy! Allow tenders to rest for a minute before serving.