
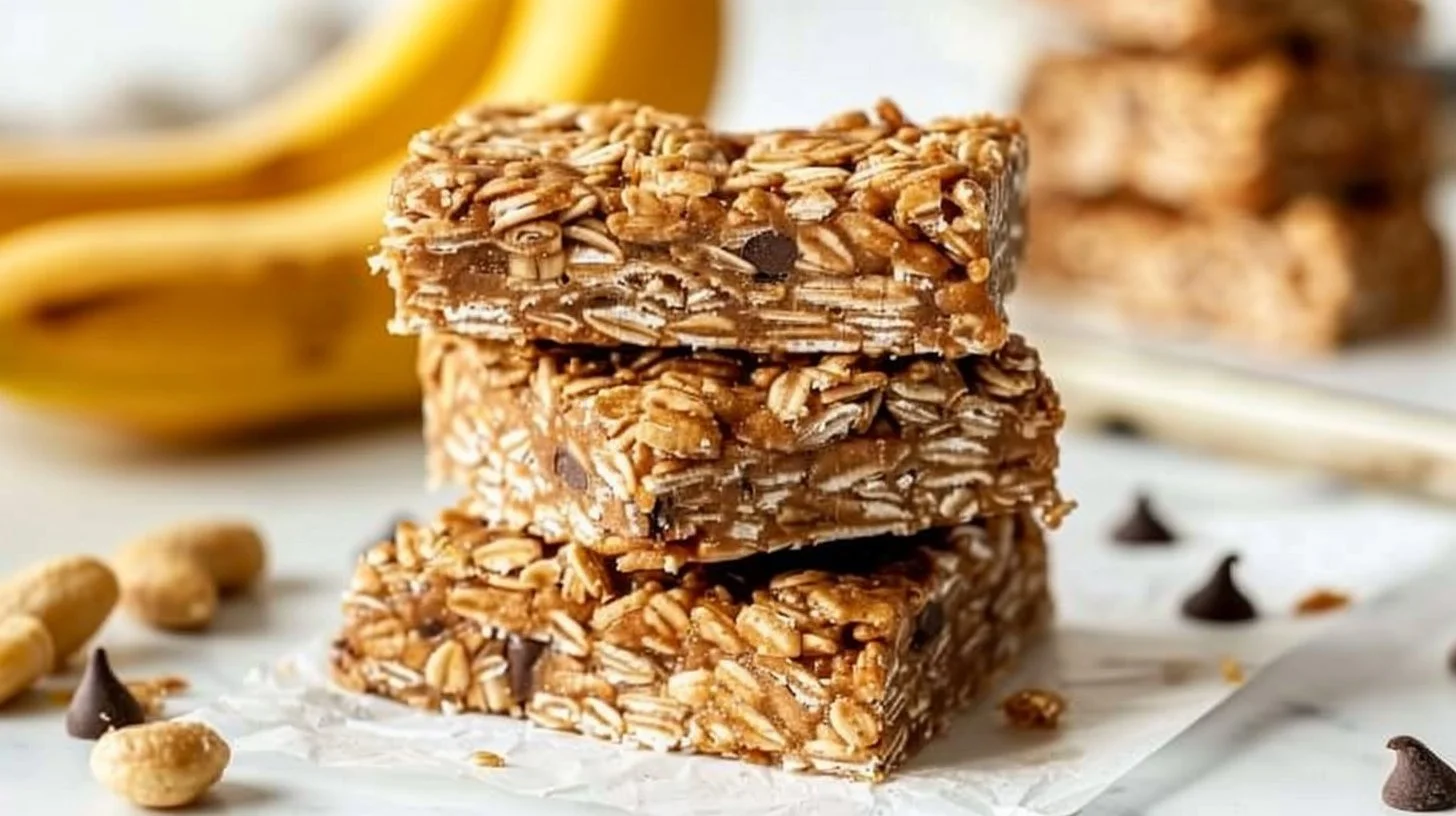
Are you looking for a delicious and nutritious snack that the whole family will love? Look no further! Our Banana Snack Bar is not only packed with wholesome ingredients but is also incredibly easy to make. These bars are chewy, satisfying, and bursting with natural sweetness from ripe bananas. They are perfect for busy mornings, after-school snacks, or even that mid-afternoon energy boost. In this post, you’ll discover how to whip up these delightful bars and why they’re your new go-to healthy treat.
Why You’ll Love This Banana Snack Bar Recipe: The Ultimate Healthy Treat
This recipe is sure to become a family favorite! Here’s why:
- Quick and Easy: With just a few simple ingredients and minimal prep time, you can have these bars in the oven in no time.
- Perfect for Beginners: Even if you’re new to baking, this recipe is straightforward, requiring no complicated techniques or special skills.
- Ideal for the Whole Family: Everyone, from toddlers to grandparents, will enjoy these tasty bars, making them an excellent choice for family snacking.
- Economical: Using everyday ingredients means this snack won’t break the bank.
- Nutritious Goodness: Packed with oats and bananas, these bars provide fiber and energy without unnecessary additives.
The Necessary Ingredients
Before we dive into the preparation instructions, let’s gather all the ingredients you’ll need. Here’s what you’ll need for our Banana Snack Bars:
- 2 ripe bananas
- 2 cups rolled oats
- 1/2 cup honey or maple syrup
- 1/2 cup peanut butter or almond butter
- 1/2 teaspoon vanilla extract
- 1/2 teaspoon cinnamon
- 1/4 teaspoon salt
- Optional: Nuts, chocolate chips, or dried fruit
Notes and Substitutions on Ingredients:
- Bananas: Ripe bananas are essential for sweetness and moisture. If you don’t have ripe bananas on hand, you can speed up the ripening process by placing them in a brown paper bag for a day.
- Oats: Rolled oats give the bars a chewy texture. You can use quick oats but note that the texture may be different. For a gluten-free version, opt for certified gluten-free oats.
- Sweeteners: Honey and maple syrup both work well, but for a lower-glycemic option, consider using agave syrup.
- Nut Butters: Almond butter can be substituted with tahini or sun butter for a nut-free option.
How to Prepare the Banana Snack Bar Recipe: The Ultimate Healthy Treat Step by Step
Now that your ingredients are ready, let’s make these delicious Banana Snack Bars. Follow these steps for guaranteed success:
- Preheat your oven to 350°F (175°C) and line an 8×8 inch baking dish with parchment paper.
Why? Preheating helps create an even baking temperature, and the parchment paper ensures that the bars don’t stick.
Pro Tip: Slightly grease the parchment paper to make removing the bars easier once baked. - Mash the ripe bananas in a mixing bowl using a fork until mostly smooth.
Why? The mashed bananas provide natural sweetness and moisture, binding the ingredients together effectively.
Pro Tip: Use very ripe bananas for the best flavor; browning on the peel is a good indicator. - Combine ingredients: Add the rolled oats, honey (or maple syrup), peanut butter, vanilla extract, cinnamon, and salt to the mashed bananas. Mix until well combined. If desired, fold in optional ingredients like nuts or chocolate chips.
Why? Mixing ensures that the flavors meld together, and folding in extras adds texture and flavor.
Pro Tip: Use a rubber spatula to gently combine ingredients without overmixing, which can make bars dense. - Pour the mixture into the prepared baking dish and spread it evenly.
Why? Spreading the mixture evenly ensures uniform cooking and texture across the bars.
Pro Tip: Use the back of the spatula or your hands (lightly moistened) to press it down firmly into the corners. - Bake for 25-30 minutes or until the edges are golden brown.
Why? Baking it just right gives the bars a perfect chewy texture without being too dry.
Pro Tip: Keep a close eye towards the end of the baking time, as ovens vary; a toothpick should come out clean. - Let cool before slicing into bars. Enjoy!
Why? Allowing the bars to cool helps them set and makes them easier to cut.
Pro Tip: For cleaner cuts, use a sharp knife and cut them when they are mostly cool, but still slightly warm.
Serving Suggestions
Now that you’ve made the Banana Snack Bars, you might wonder how best to serve them. Here are some creative ideas:
Perfect Pairings
- Drinks: Enjoy them with a glass of cold almond milk or a steaming cup of tea for a cozy snack.
- Sides: Pair them with yogurt and fresh fruit for a wholesome breakfast or dessert.
Occasions
- Weeknight Dinners: Serve as a delightful ending to your family meal.
- Special Occasions: Perfect for potlucks or backyard barbecues; they travel well and will surely impress guests.
Serving Tips
- Cut into bars or squares for easy grab-and-go snacks.
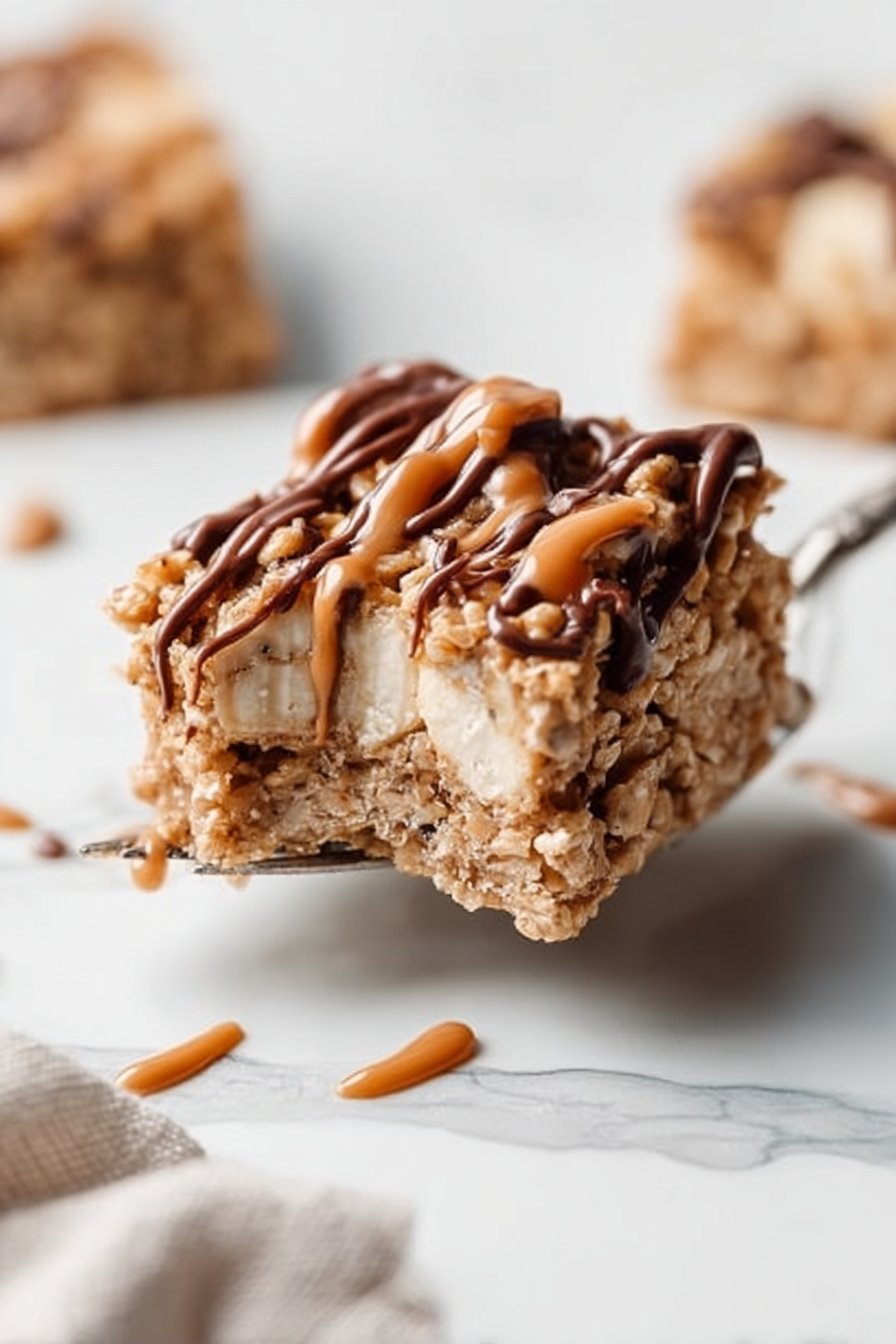
- Drizzle with extra nut butter or melted dark chocolate for an indulgent treat.
Storage and Reheating Tips
To keep your Banana Snack Bars fresh and enjoyable, follow these storage tips:
Refrigerated
- Duration: Up to one week.
- Container: Store in an airtight container to prevent moisture from making them soggy.
Frozen
- If possible: You can freeze them for up to three months.
- Packaging: Wrap individual bars in plastic wrap and place them in a zip-top freezer bag. This helps maintain flavor and texture.
- Defrosting: To enjoy, just leave them out at room temperature for about 30 minutes, or microwave for a few seconds if you want to heat them up.
Reheating
- Best method: Microwave for 10-15 seconds if you prefer warm bars. This also helps evoke that freshly baked taste.
Guaranteed Success Tips
To ensure a perfect outcome, remember these golden rules:
- Don’t overmix the batter: Overmixing can lead to dense bars. Mix just enough to incorporate all ingredients.
- Adjust baking time: Keep a close eye on the bars in the oven to avoid over-baking. Every oven is different!
- Cool completely before slicing: This helps maintain the structure of the bars for cleaner cuts.
- Use ripe bananas: The riper, the sweeter; they make a significant impact on flavor.
- Experiment with add-ins: Don’t hesitate to try various nuts, seeds, or dried fruits for unique flavors!
Recipe Variations
Feel free to put your spin on these delightful bars with these fun variations:
- Nutty Delight: Add 1/2 cup of mixed nuts like walnuts or pecans for an extra crunch.
- Chocolate Lovers: Stir in 1/3 cup of mini chocolate chips for a sweeter treat. You can use dark chocolate for a healthier option!
- Spiced Version: Add a pinch of nutmeg and a dash of ginger for a warm, spicy flavor perfect for the fall season.
- Tropical Twist: Fold in 1/2 cup of shredded coconut and some chopped pineapple for a tropical flair.
- Protein-Packed: Mix in 1/4 cup of protein powder to give your bars an extra nutritional boost.
Frequently Asked Questions (FAQ)
Q: My bars came out too dry; what did I do wrong?
A: Overbaking is the most common reason for dry bars. Make sure to check them a few minutes before the suggested baking time.
Q: Can I use instant oats instead of rolled oats?
A: Yes, but the texture may be different. Instant oats will create denser bars, while rolled oats provide a chewier texture.
Q: How do I know when my bars are done baking?
A: Look for golden edges and a solid center; a toothpick inserted into the center should come out clean or with a few moist crumbs.
Q: Can I make these bars nut-free?
A: Absolutely! Just replace nut butters with sun butter or tahini to keep them nut-free.
Q: Can I add fresh fruit to the mixture?
A: While fresh fruit can add moisture, it may also affect the texture. Use small bits of dried fruit like cranberries or raisins instead.
Q: Are these bars vegan?
A: They can be made vegan by using maple syrup and ensuring that your nut butter is free from added ingredients.
Q: How can I make these bars less sweet?
A: Reduce the amount of honey or maple syrup by a couple of tablespoons, and consider adding more cinnamon to enhance flavor without extra sweetness.
By following this comprehensive guide, you’re now well-equipped to create your own delicious Banana Snack Bars! Not only are they healthy and affordable, but they also cater to various dietary preferences. Enjoy whipping up this nutritious and delightful treat for you and your family!